Hi everyone! Happy Tuesday and happy August! It’s starting to get very busy around my house, I don’t know about you! We have one heading to college, one heading to 10th grade and I’m about to head back to school to a brand new, newly built classroom and year 23!
This week is an exciting one at Taylored Expressions – all of the $100 bonus products from the last 6th months are now for sale AND TE is releasing some fun new coordinating goodies to go with them so if you already have some of these there are fun new products to go with them.
Daisies for Days
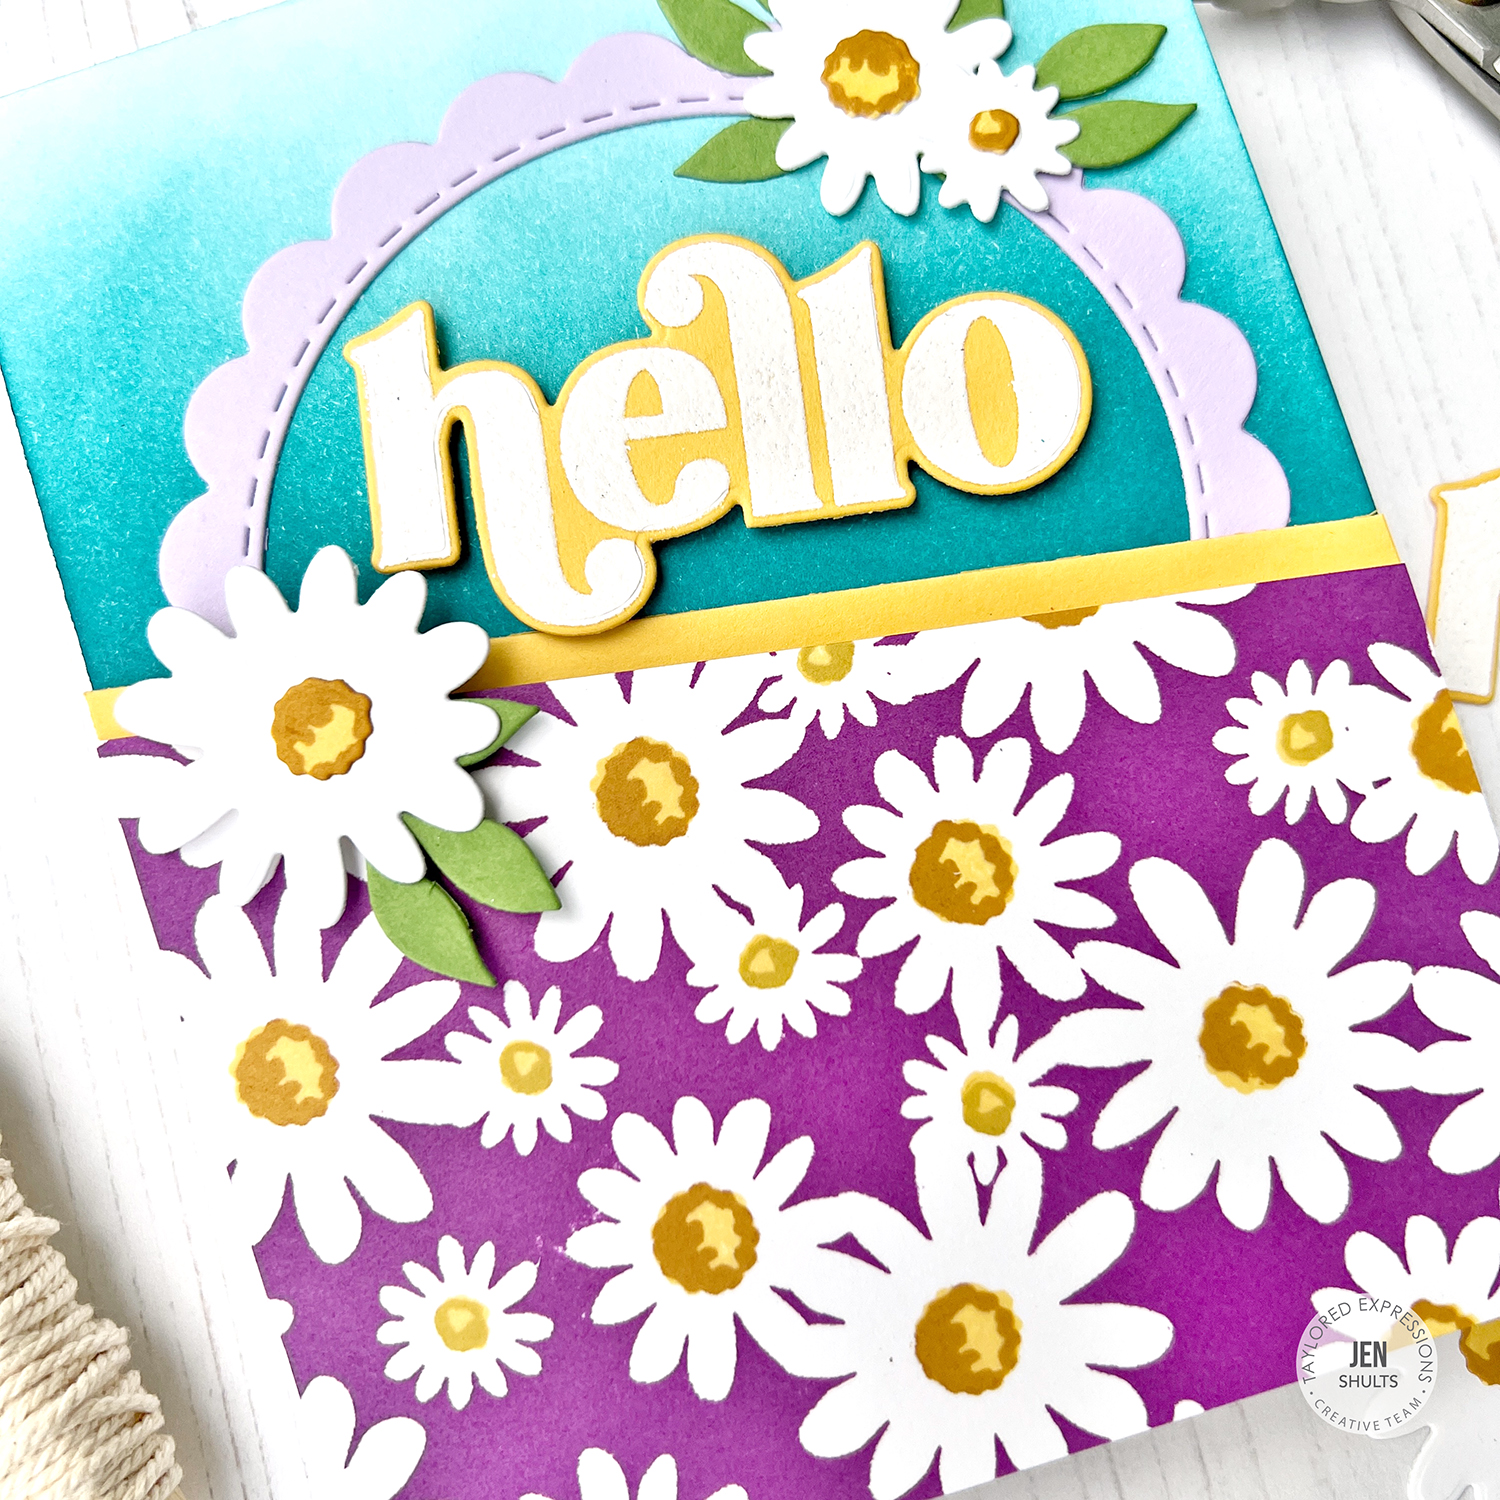
My first card uses the Daisies for Day Cling and Clear combo stamp and a few others from the release. To make this card:
- Cut and fold and A2 cardbase. Cut an A2 piece of Sugar Cube and stamp the Daisies for Days cling stamp on the cardstock using Plum Punch ink (a MISTI or similar stamp platform will help with coverage). Stamp the flower centers using Pineapple and Honey ink. (Note: there are duplicate centers in the stamp pack.) Diagonal cut the background across the middle (save the other piece to make a duplicate or different card).
- On another piece of A2 Sugar Cube ink blend Tropical Punch ink from the middle up using Blender Brushes, fading as you go. Cut the 1/4″ Easy Strips from Pineapple cardstock. Die cut the largest Stitched Frame Stacklets 3 from Lavender Glaze cardstock. Layer the blended background, one Easy Strip, circle, and the daisy background on the A2 cardbase as shown. Adhere to the Daisy background with foam tape.
- Die cut a handful of daisies from Sugar Cube cardstock. Stamp the centers with Pineapple and Honey ink. Cut a few leaves to coordinate from Peapod cardstock (I used one of the leaf sprigs from Squeeze the Day but you could use other leaf dies also.)
- Stamp the Get the Word Out – Hello stamp on Pineapple cardstock using Versamark ink and heat emboss with white embossing powder. Die cut with the coordinating die.
- Assemble the rest card as shown, adding foam tape behind the hello die cut and one of the flowers.

Links to card ingredients:
|
Modern Sentiments

My second project is a pair of Mini Slim cards using the Anytime Sentiments stamp set and Modern Sentiment Labels. I REALLY like these sentiments and dies – I stamped a bunch just to have them ready to add to a card at any time. I’m in the middle of making a stack of cards for my daughter to have at college and these two are for her. Directions for making these are below:
- Cut a Mini Slim card base from Oreo and Sugar Cube (or I used one of TE’s pre-cut and folded Mini Slim card bases – I LOVE these). Die cut the largest Petite Scallop Mini Slim Stacklet from Oreo and Sugar Cube. Set aside.
- Stencil the Mini Slim Stencil – Prism on Sugar Cube cardstock in a color wheel using blender brushes. I used Lemon Meringue, Candy Corn, Lollipop, Jelly Donut, Cookie Monster, and Peapod. Repeat so you have two. Die cut with the largest Stitched Mini Slim Stacklet. Splatter the panels with Oreo Liquid Watercolor and Copic White ink (or Sugar Cube re-inker also works well). Set aside to dry.
- Die cut the 1/8″ Easy Strips from Oreo cardstock. Stamp the sentiments you’d like to use on Oreo cardstock in Versamark ink. Heat emboss with white embossing powder. Die cut with the Modern Sentiment Labels dies that fit your sentiments.
- Assemble the cards as shown, trimming little pieces of the Easy Strips to add accents to the corners of the cards.
|
Right now through Sunday, August 14th, place and order of $40 or more of our newly released exclusive products in the TE webstore and receive a $10 off coupon to use on your next order of $25 or more! Your coupon will be emailed after a qualifying order is placed. One coupon per customer. Coupon valid through 8/31/22.


