Hi all! Today Taylored Expressions is releasing a new stamping kit called Field Notes. This kit has a bit of a more rustic feel (though you can definitely go more modern as you’ll see below) and has beautiful flowers illustrated by the amazing Lori Craig.

The Taylored Expressions Field Notes kit includes all of the following products and retails for $85:
- Sketchbook Florals stamp set
- Field Notes stamp set
- Rough Draft background stamp
- Sketchbook Florals dies
- Frayed Edge Rectangle Masking Stencils (large and small)
- 6 matching envelope seals
- 6 matching envelopes
- Zipper storage pouch

I made three cards using the kit. For this first card I kept with the journal feel of the kit. I started by playing around with the background stamp and graphic elements in the kit to make the background panel.
Card directions:
- Starting with a piece of A2 Sea Salt cardstock center the largest rectangle from the Frayed Edge Rectangle Masking Stencils (the rectangle not the opening) and secure with a roll of tape underneath. Using a blender brush lightly brush Earl Grey ink around the outside of the mask.
- Remove the mask and stamp the full background with the Rough Draft background stamp and Sea Salt ink.
- Stamp the dot grid from the Field Notes stamp set with Earl Grey ink and the diamonds with Sea Salt ink as shown. Distress the edges with scissors or a distress tool. Wrap the lower third of the background with twine (secured with tape on the back).
- Stamp the flower on Sea Salt cardstock with Early Grey ink and color with Prismacolors (or desired coloring medium – if using Copics to color switch to Sugar Cube cardstock). Die-cut with coordinating die.
- Die-cut the tag die from the kit out of Sea Salt cardstock. Stamp with Hello in Earl Grey ink. Attach flower and tag with foam tape. Add twine bow over tag. Attach the finished card top to cardbase.


My second card has a similar look and feel to the first card, using the kit in a more rustic fashion and again using Prismacolors to color the image.
Card directions:
- Stamp the lavender flowers from the Field Notes kit on Sugar Cube cardstock using Oreo ink three times. Die cut with coordinating dies. Color with Prismacolors or desired coloring medium.
- On a 3 7/8″ x 5 1/2″ piece of Sugar Cube use the small Frayed Edge Rectangle Masking Stencil (open) with Sprinkles ink and a blender brush to stencil the upper left corner and lower right corners. Reposition the stencil a few times in each area to create different blends. Work lightly and layer up.
- Stamp the dot grid from the Field Notes stamp set in the lower right and upper left corner as shown using Toffee ink. Stamp the diamonds positioned as shown using Lavender Glaze ink and the calendar and date stamp as shown using Toffee ink. (The calendar is in the middle behind the flowers, it’s a bit less visible.) Distress the edges with scissors or a distressing tool.
- Create a twine ring for the center of the card and secure with glue. Position the flowers as shown and secure the left and right flower with liquid or tape adhesive. Attach the center flower with foam tape.
- Create a twine bow and attach to the stem of the center flower with liquid adhesive.
- Create a Toffee cardbase and attach the flower panel to the cardbase with foam tape positioned as shown.


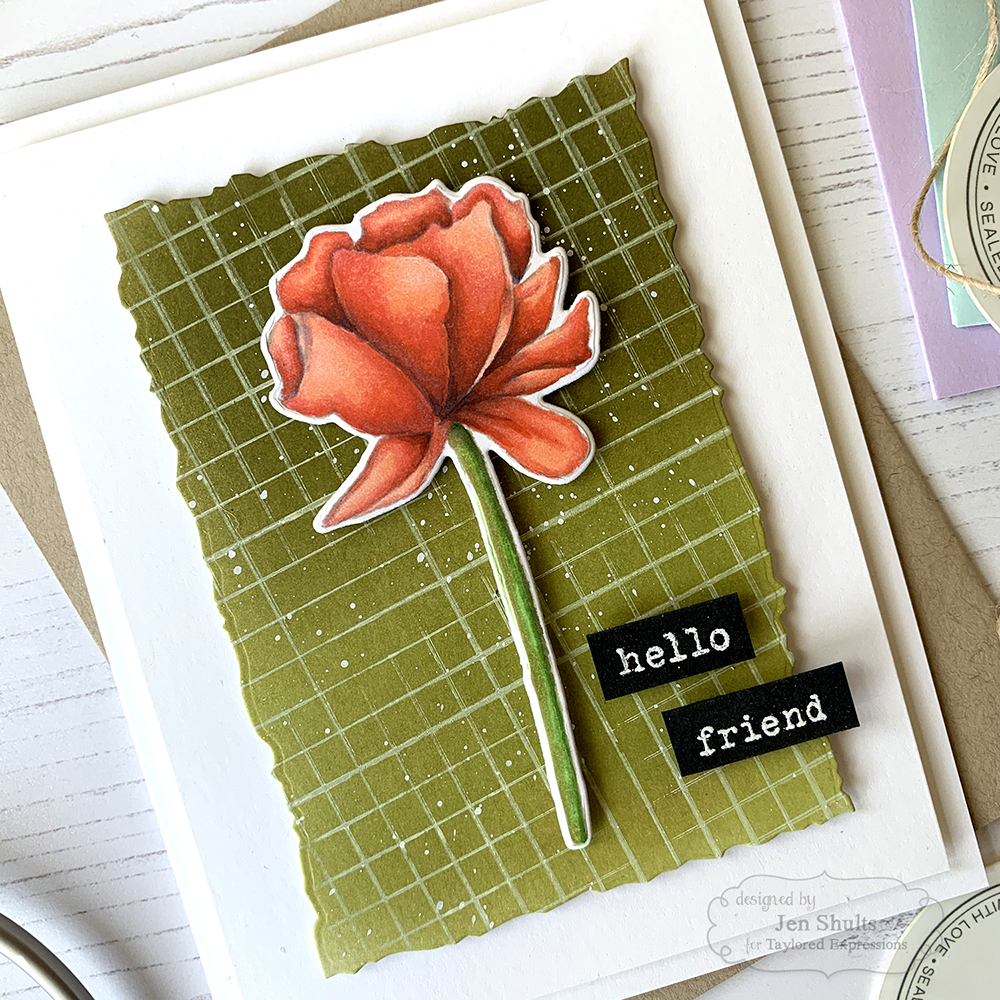
My third and final card uses the field notes kit in a more modern simple layout. I wanted to keep this one simple so the flower was the star. I used Copics and no line coloring for this flower.
Card directions:
- Stamp the flower on Sugar Cube cardstock with Toffee ink. Color with Copics or desired coloring medium. Die cut with coordinating die. (For more options with no line coloring you can also use Sea Salt or Cupcake. To color without the no line technique you could stamp with Oreo or Chocolate Truffle.)
- Die cut the Frayed Edge Stacklets (second from largest) die from Sea Salt cardstock. Ink blend Sweet Basil and Granny Smith ink across the cardstock. (I used Sea Salt to tone down the Granny Smith just a bit.) Splatter with Sugar Cube reinker diluted lightly with water.
- Using a stamp positioner, stamp the Rough Draft background on the blended die cut at an angle using Sugar Cube ink. Multiple impressions were used to get a bolder line. (Mine did shift a little because I heat set the ink between inking. It didn’t bother me so I went with it.)
- Cut a 3/8″ strip of Oreo cardstock. Stamp the sentiments in Versamark and heat emboss with white embossing powder. Trim the sentiment pieces.
- Assemble the card by creating an A2 Sugar Cube cardbase. Cut a second piece of Sugar Cube to 3 7/8″ x 5 1/8″ and attach to the cardbase with foam tape. Attach the green panel, the flower and sentiments with foam tape.

Please stop over to the Taylored Expressions blog to see more samples and visit the other TE Creative Team members for more inspiration on how to use this fantastic kit!
TE Creative Team:
|
Hello Card Ingredients:
|
Lavender Card Ingredients:
|
Hello Friends Card Ingredients:
|


One response to “Taylored Expressions Field Notes Kit”
Oh, these cards are beautiful. The purple one is my favorite, but who wouldn’t love getting any of them? Thanks for the inspiration.