
Hi! It’s Tuesday and that means there is a new Taylored Expressions release happening today and it’s a spooky one! The new Halloween release has LOADS of gorgeous new products and I have three projects to share with you!

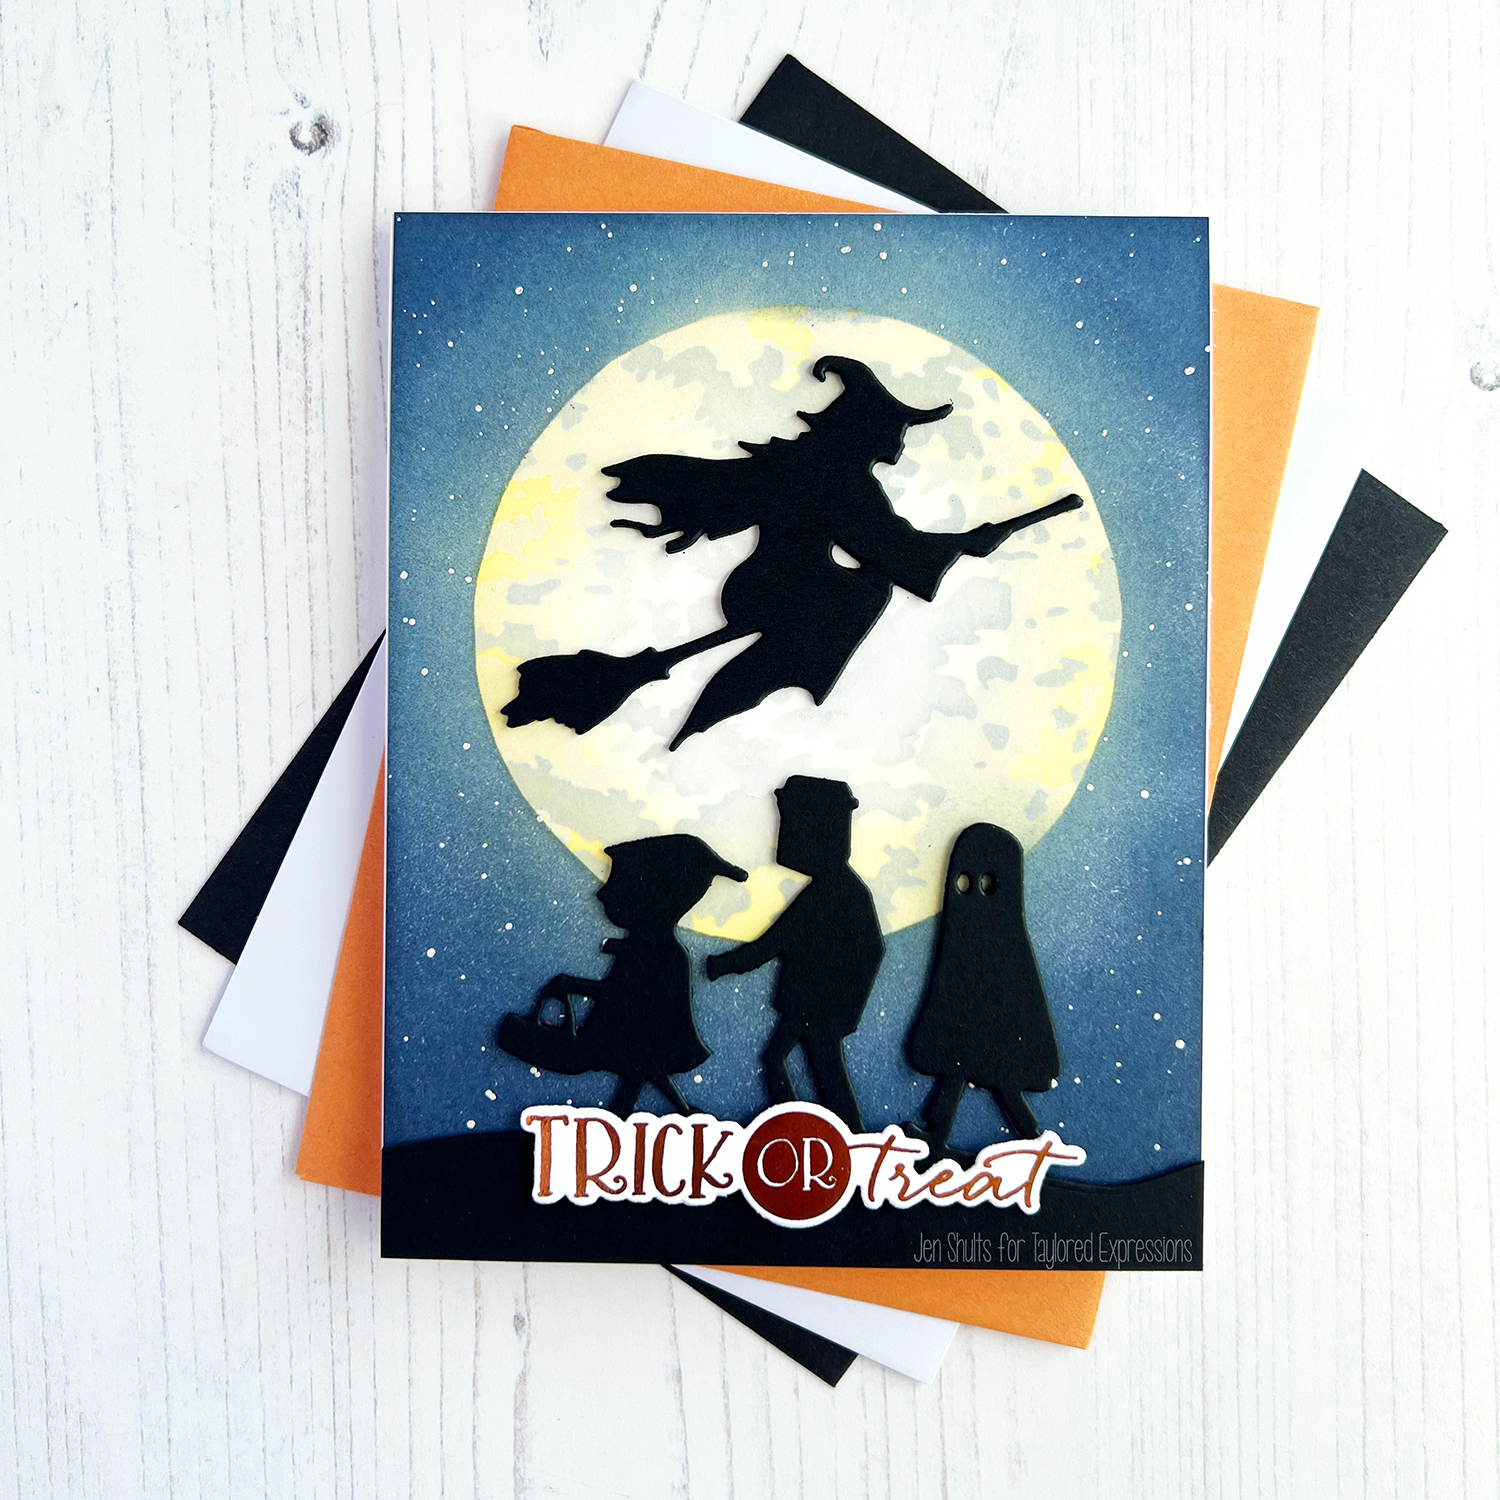
My first project features 4 new products – The Moonlight Layering Stencil, Trick or Treat Border, Best Witches and Ghostly Greetings. To make this card I started with the background layer. To stencil the moon I stenciled layer one with Banana Cream Pie working heavier on the edges and getting lighter toward the middle. On layer 2 I used Sea Salt and layer three I used Oyster very lightly, also working lighter toward the center. After removing the stencil I used layer 1 to create a circle mask for the moon. With the mask in place I lightly inked around the moon with Potato Chip ink (I used this instead of Banana Cream Pie because it’s a touch greener and would give the glow I wanted. Leaving the mask in place, I inked with Blue Corn ink from the edges and again with the mask in place I splattered with Gansai Tambi Starry Colors watercolors in White Gold. This gives the splatter just a touch of luminescence.

The rest of the card was super easy – I die cut and layered three of the Best Witches dies from Black Licorice cardstock and glue this down to the center of the moon. On the bottom I cut the Trick or Treat Border out of Black Licorice and popped it up on thin foam squares. The sentiment was foiled with orange foil and die cut with the coordinating dies.
Card Supplies:
|


Next I have two cards to share with you using Fun Frames Cutting Plate, Little Critters – Halloween and Exclamation Points Die & Clear Combo. To start these cards I worked on the background first. Each was inked, tone on tone for a subtle gradient from the bottom up then the purple card was splattered with white and black watercolor. Next, I did cut the frame frome each keeping all of the pieces.

I stamped all of the critters on X-Press It Blending Cardstock with Oreo Ink and colored each image with OLO markers. The sentiments were created by die cutting the Exclamation Points talk bubbles out of Sugar Cube cardstock then inking them with Candy Corn ink and stamping the sentiments in Oreo ink.

When putting the cards together I took the cut outs from the purple card and put them in the green card and vice versa. I placed the Little Critters and then in the open spaces on the purple card I added bats from Little Bits Bats cut from Black Licorice cardstock and on the green card I used Little Bits Spiders.
Card Supplies:
|


My last project features the new addition to the gnomes collection – Fright Night Dress Up. I created three tags using the new gnome kit and couldn’t resist making a very loose Wizard of Oz connection. (Note: the Dorothy tag uses elements from the Gnome Bunny – Dress Up kit.)

I have to say the Elphaba tag is definitely my favorite. I started this tag by cutting the Gnome base from Gnome Sweet Gnome from Black Licorice cardstock and the hands and nose pieces from Mint Julep. Her braids are cut from Plum Punch cardstock and her shoes from Candy Corn. I then got to work on her accessories from the Fright Night – Dress Up collection. Her hat was cut from Black Licorice, the band from Candy Corn and the buckle from Pineapple. Her broom is cut from Mocha and Toffee with a tiny bit of twine wrapped around the straw. Her cauldron was cut from Black Licorice and the foam from Granny Smith. The bubbles were added by gluing on Bits & Pieces – Drip Drops. For the tag I stenciled the Spiderweb Stencil with Earl Grey ink (LIGHTLY) on Sea Salt cardstock and added the hanging spider from teh top of the tag.

The wizard was actually the most difficult of the three to get figured out as I was thinking along the movie lines so I took some liberties, lol. He’s definitely Emerald City inspired. He also started with a Black Licorice body cut from the gnome base in Gnome Sweet Gnomes. His nose and hands were cut from Peaches & Cream. His wizard robes were cut from Dill Pickle cardstock using the robes from Gnome It All Dress Up. I cut the robes twice and layered them so they reached his feet. I added a green glitter cardstock wizard hat layered with a Pineapple background. His hair and mustache were cut from Sea Salt cardstock. For the background I stenciled stars using the Spooky Nights Layering Stencil

For Dorothy I pulled out the Gnome Bunny – Dress Up dies from Easter and got to work. I stamped her body with the Gingham Check Background Stamp in Cotton Candy ink and die cut the Gnome base. Her bows are cut from Cotton Candy cardstock. The basket was cut from Honey cardstock and I used a scrap of Sugar Cube to make the little pillow/blanket in the basket. Her shoes were cut from red glitter cardstock. Toto was cut from Earl Grey cardstock using the Silhouettes – Small Breed die. The tag was cut from Pineapple and tone on tone inked from the bottom up and embossed with the Brick Embossing Folder.
|


