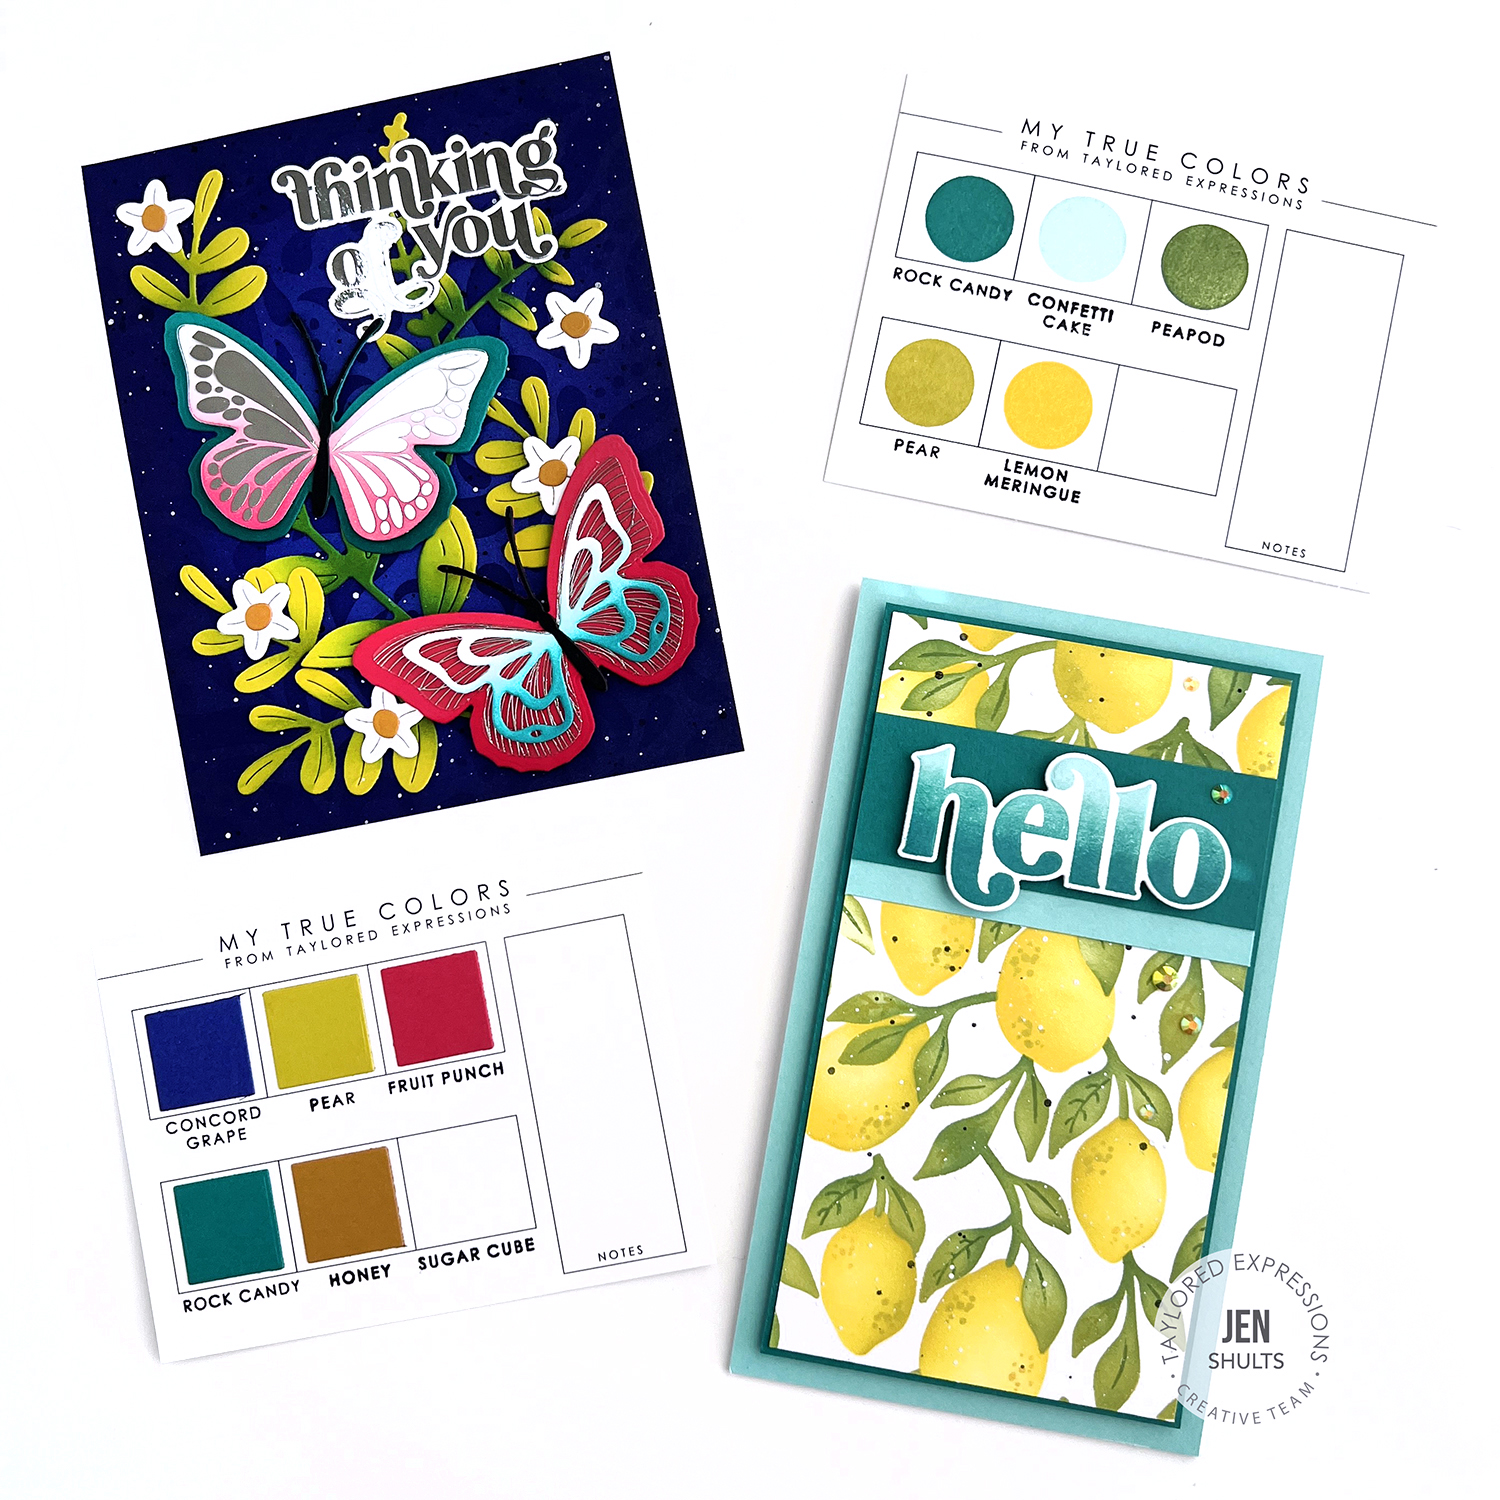
Morning! I hope your week is off to a good start! Today I have two projects to share with you using new ink and cardstock from the Taylored Expressions Shades of Summer release. There are three new colors – Pear, Rock Candy and Concord Grape. Each one is available in full size ink pad, mini ink cube, re-inker and cardstock.

Now for a limited time, we’ve got a Full Set Syndrome Bundle for $80 that includes: 45 sheets of cardstock (15 of each color), 30 A2 envelopes (10 of each color), 3 full size ink pads, 3 mini ink cubes, 3 ink refills, True Colors – Shades of Summer stamp set, and True Colors – Shades of Summer labels. Offer valid while supplies last.

Alright, so let’s take a look at these inks! My first card pairs Rock Candy, Pear, Lemon Meringue, Pea Pod and Confetti Cake. Pear is the color I never knew I needed for ink blending leaves and lemons perfectly! Instructions are below for how to make this card:
- On a 6×6 square of Sugar Cube ink the leaves layer of the Squeeze the Day Stencil & Clear set. Use Pear and Peapod inks to create a subtle natural look to the leaves.
- For layer 2 of the stencil start with Lemon Meringue ink, applying the ink to the ink is darker around the edges of the lemons. Using pear ink and gentle application add another layer of ink in the shadows/curved edges of the lemons. (See example.)
- Remove the stencil and use Peapod ink to stamp the leaf details from the clear stamp set. Use Honey and Pear ink to stamp the rind detail on the lemons. Trim panel to 3″x5.5″. (You should have enough for two cards.)
- Using Oreo Liquid Watercolor and Dr. Ph. Martin’s White splatter lightly across the lemon panel.

- Mat lemon panel with Rock Candy cardstock.
- Stamp Get the Word Out Hello on Sugar Cube using Rock Candy and Confetti Cake ink, lightly blending with a blender brush on the stamp to create a light gradient between the two colors. Die cut with coordinating die.
- Cut a strip of Rock Candy that is slightly taller than the word hello and a thin strip of Confetti Cake cardstock. Layer together where you want your sentiment as shown. Adhere the hello sentiment over the color block panel with foam tape.
- Attach to a Confetti Cake mini slim card base with foam tape and add a few yellow and turquoise rhinestones from the Bits & Pieces Rainbow Rhinestones package.

Card Supplies:
|

My second card features all three of the new colors along with Fruit Punch and Honey cardstock. I love these colors together – the Concorde Grape color really allows the other colors to pop!

To make this card:
- Cut a 4.25×5.5 Concord Grape panel. Blend around the edges with Concord Grape ink. Attach the Flickering stencil and ink again with Concord Grape ink. Remove stencil and splatter with Oreo liquid watercolor and Dr. Ph Martin’s Opaque White. Set aside to dry.
- Die cut a few leaves from Garden Variety 1 and Garden Variety 2 die set from Pear cardstock. Ink lightly with Peapod and Pear ink. Die cut the small 5 petal flower from Garden Variety 2 from Sugar Cube cardstock 5 or 6 times, add Honey cardstock centers.
- Die cut the large butterfly from Beautiful Butterflies from Fruit Punch and Rock Candy cardstock. Cut the other two butterfly layers from Sugar Cube. Ink blend the medium solid butterfly with Fruit Punch ink and the smaller overlay with Rock Candy ink as shown.

- Foil the Foil It Beautiful Butterflies acetate overlay with Silver Fun Foil. Die cut with the medium butterfly die. Die cut two butterfly bodies from Black licorice cardstock. Assemble the butterflies, layering as shown in the image. Butterflies layers were only glued in the center so they can be bent up for dimension.
- To assemble, arrange the leaves on the background panel, clustered more densely at the bottom. Add the butterflies, positioning as shown in the photos. Add the small flowers throughout.
- Foil the Foil It – On Occasion stamps with Silver Fun Foil, and die cut with coordinating die. Add sentiment to upper right corner of the card. Attach panel to a Sugar Cube cardbase.
Card Supplies:
|


