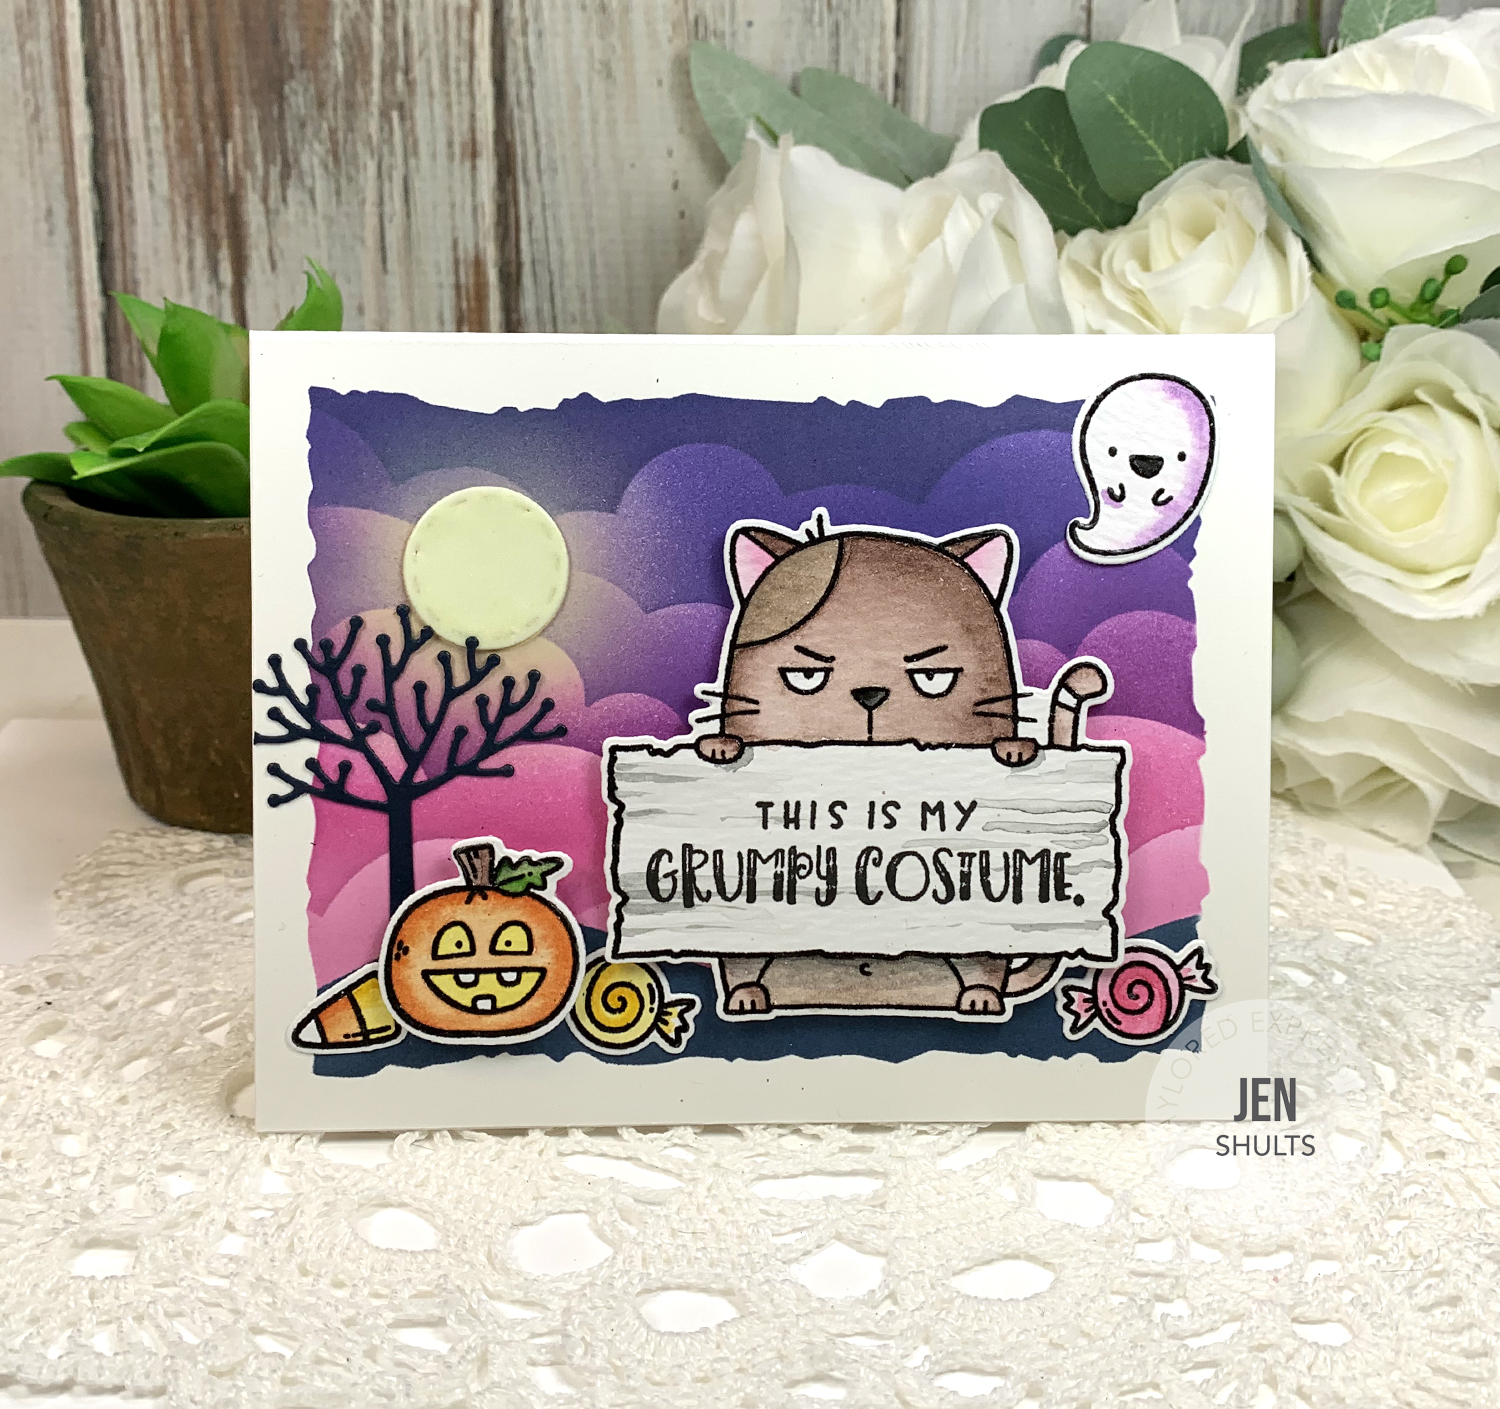
Hey there! Today is the Taylored Expressions Halloween release day! We have so much new and adorable spooky goodies to share with you!
Big Grumpy Cat Card Instructions:
The first card I am sharing with you today uses some new additions to the Big Grumpy line – Big Grumpy Halloween. I LOVE this set. The sentiments are perfect and the little add on stamps are so so cute. I paired the new Big Grumpy Halloween stamps (and dies) with Big Grumpy Cat. Below are instructions for how to make the card:
- Create a top folding A2 card base from Sugar Cube cardstock. Adhere the masking stencil with Pixie Spray or tape (I used the Frayed Edge masking stencil from the Field Notes kit, you could use the rectangle masking stencil instead.)
- Die cut a small circle using Stitched Circle Stacklets to use as a moon placeholder. Adhere with low tack tape. Die cut a hill from Build a Scene Rolling Hills (Keep both pieces). Mask the sky with the top hill cut and ink the hill with Blue Corn. Once inked, mask the hill with the other piece to ink the sky.
- Ink the clouds using Eggplant, Jelly Donut, Plum Punch and Lollipop ink. Carefully ink a little bit lighter as you near the moon to create a the “glow” of the moon. Remove the moon mask and lightly blend on Potato Chip ink over the “moon glow”.
- Ink the moon mask with Versamark. Heat emboss with TE’s glow in the dark embossing powder. (I applied 3 coats.)
- Stamp Big Grumpy Cat and all of the Big Grumpy Halloween stamps on watercolor paper using Oreo ink. (I stamped additional candy corn and candy.) Die cut each element. Watercolor with TE’s Liquid Watercolor.
- Die cut the empty tree from Build a Scene Winter Trees from Blue Corn cardstock. Assemble the scene using liquid adhesive and foam tape.
- On the inside of the card stamp the Happy Halloween sentiment and attach the remaining pieces from the Big Grumpy Halloween set.


Boo To You card set

My second set of projects for today are some very clean and simple and quick Halloween cards using the previously release Handlettered Halloween with new dies and the Spiderweb Stencil.

Card Set Instructions:
- Create 2 vertical A2 cardbases from Sugar Cube Cardstock. Cut two pieces of Sugar cube to 4″ x 5.25″.
- Adhere the small Masking Stencil Rectangle to one of the cut pieces of Sugar Cube. Adhere the spiderweb stencil over the masking stencil with Pixie Spray. Blend Eggplant and Jelly Donut ink over the spiderweb stencil, fading out to the center. Remove the stencils, clean and repeat on the other piece of Sugar Cube with Sweet Potato Pie and Candy Corn ink. Remove the stencils and set aside.
- Die cut the stenciled spiderweb with the slightly larger Stitched Rectangle Stacklets die. Repeat on the second spiderweb. Keep all pieces (and keep sets together).
- With spiderweb nested in the frame, center (withOUT adhesive) panel on the cardbase. Adhere the spiderweb piece with adhesive. Adhere the frame with foam tape. Repeat for the second card.
- Dust vellum with antistatic powder. Stamp sentiments with Versamark. Heat emboss with black embossing powder and die cut with coordinating dies. Cut very thin pieces of foam tape to hide behind the thickest portions of sentiment letters. Attache sentiments to the center of spider webs.
- Stamp and color the pumpkins (mine were leftovers from other cards). Attach to corners of spiderweb opening with foam tape.

Halloween Tags
My last project for today is a set of quick and super cute Halloween Tags using the new Spooktacular stamp set designed by Much Sketch.

To make these tags follow the instructions below:
- Cut 4 tag bases out of Oreo cardstock using the largest of the Tag Stacklets 3 tags. Cut 4 circles out of Sugar Cube using the Stitched Tag Stacklets die that nests inside the tag.
- Stamp two of the ghosts, one of the pumpkins and one of the haunted houses from Spooktacular on watercolor paper using Versamark and heat emboss with black embossing powder. Be sure to use an antistatic powder before stamping.
- Color the stamps with TE’s Liquid Watercolors. Die cut with the coordinating dies.
- On the Sugar Cube circles use ink and blender brushes to stencil a variety of different Halloween themed backgrounds. I used the Set the Scene Cloud Stencil Strips, Polka Party (with two colors), and the Spiderweb Stencil. Allow these to dry for about an hour or heat set.
- Use an antistatic tool on the backgrounds once dry. Stamp the sentiments as shown with Versamark and heat emboss with white or black embossing powder.
- Attach the circles to the tags with foam tape and add the images to the tags with more foam tape. Add a twine string and your tags are ready for some Halloween goodie bags!

That’s it for me today! I hope you enjoyed these projects and will head over to the Taylored Expressions blog for more inspiration!
My Grumpy Costume Ingredients:
|
Handlettered Halloween Cards
|
Halloween Tags
|


