
Hi! I hope you are having a great day today! As we speak I am currently exploring Fayetteville, Arkansas with my family and oldest as she is going to be heading there in the fall for her Freshman year of college. Fayetteville is beautiful and I can’t wait for her to go on her next big adventure (well… I can but I know she’s ready and can’t wait!).
Today Taylored Expressions is releasing a bunch of gorgeous new products that have a Mother’s Day and floral theme and they are all STUNNING!
First up is the Mini Slim Botanical stamp with its coordinating die. I made a two-card set using the stamp and coordinating color scheme. I think I’ve found a new love of floral greens, Guava, and Peaches and Cream cardstock. They are so pretty together!

To recreate these follow the steps below:
- Stamp the Mini Slim Botanical stamp on Sugar Cube cardstock with Oreo ink and die cut with the coordinating die. Color with coloring medium of choice (I used Copic Markers). Repeat to make 2 card.
- Die cut Peaches & Cream cardstock with Stiched Mini Slim Stacklets. Using Peaches & Cream ink and blender brush create a tone on tone gradient half way across the card. Repeat with Guava cardstock for second card.
- Lightly heat set inked panels and liberally apply powder tool to both. Stamp each with Rough Draft Background Stamp using Versamark ink then apply White Pearl embossing powder and heat set.
- Die cut Guava and Peaches & Cream cardstock with Mini Slim Botanical die center (I did clip this from the center with wire cutters). Using a blender brush and tone on tone ink create a gradient halfway up the die cut. Apply powder tool, liberally. Stamp centers with sentiment in Versamark then apply white embossing powder and heat set.
- Layer card elements on a Mini Slim Top Folding Sugar Cube cardbase as shown using 1/16″ foam tape to adhere each layer.


|


The next product I used today is an exciting addition to the layering stencil one at TE – a mini slim layering stencil set that is STUNNING and perfect for so many occasions! I created a three-card set on Toffee cardstock.

To recreate these follow the steps below:
- Lightly spray stencils with Pixie Spray (double checking to make sure yo are spraying the back… don’t ask.)
- Adhere stencil 1 to an 8 1/2 x 11 piece of Toffee cardstock.
- Use two to three colors of green ink and a blender brush to apply color to the leaves of the flowers. I used Peapod and Granny Smith ink and the Bitty Blender Brushes for control. Make sure to ink the registration squares or outline them with a pencil.
- Remove the stencil carefully. Align stencil 2 using the registration squares. I used warm colors of ink on this stencil to color the first layer of flowers. I used Lollipop, Candy Corn and Pineapple for this layer. In some of the flowers I blended from one color in the center to a second color around the edges of the flower. (I did sneak in some Jelly Donut for the center of the Lollipop flower). Make sure to ink the registration squares or outline them with a pencil.
- Remove the stencil carefully. Align stencil three using the registration squares. On this layer I focues on cool colors using Jelly Donut and Cookie Monster and a tiny bit of Lollipop. Carefully remove the stencil when all of the flowers have been inked. Lightly heat set (only necessary because of embossing in step 7).
- Using a trimmer cut the three panels apart. Die cut each with the largest Stitched Mini Slim Stacklet.
- Liberally apply the powder tool to the sentiment area of each panel. Use Versamark ink to stamp the sentiments and heat set with black embossing powder.
- Die cut three of the largest Petite Scallop Mini Slim Stacklets from Sugar Cube cardstock. Adhere each to the flower panels using tape or liquid adhesive. Attach panels to cardbases using foam tape. Add Tiny Diamonds in white using liquid adhesive as shown.


|


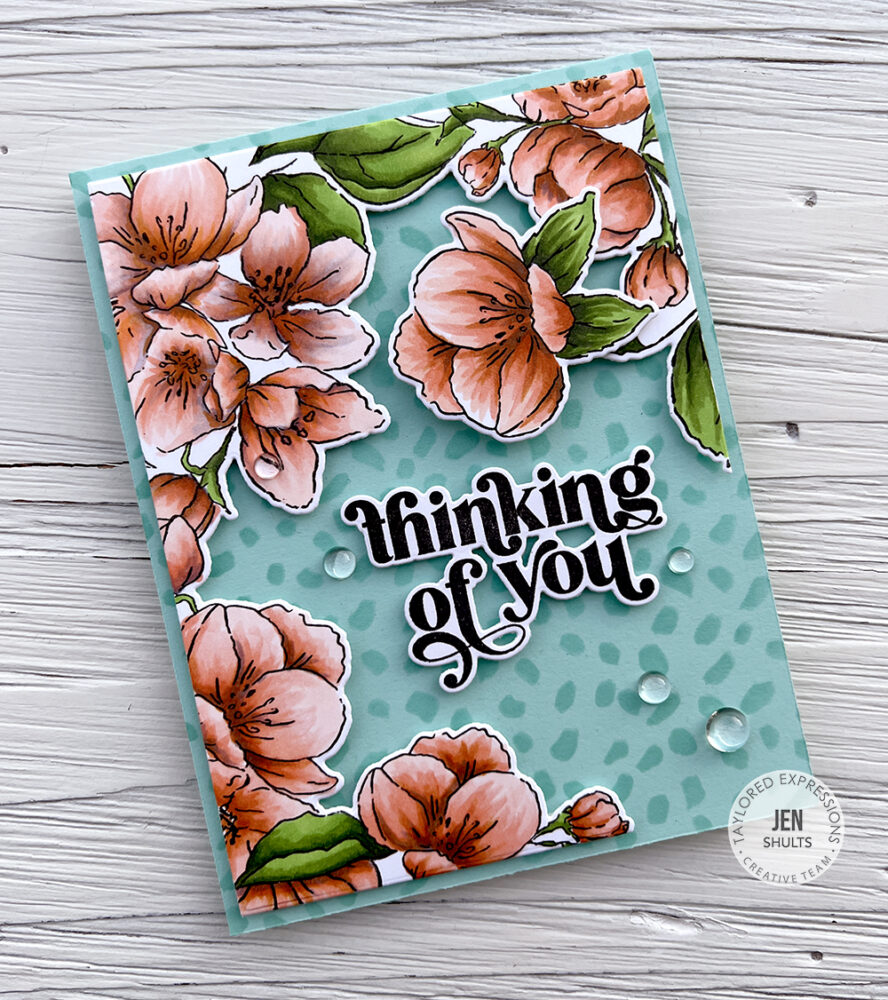
My last card features the new Fancy Florets stamp and coordinating dies. This stamp really does all the work for you!

To recreate this card:
- Stamp Fancy Florets on Sugar Cube cardstock using a MISTI with Oreo ink. Die cut with coordinating die.
- Color stamps with your coloring medium of choice. I used Copic Markers.
- Create an A2 cardbase using Confetti Cake cardstock. Lightly spray the Paint Swatch stencil with Pixie Spray, wait 30 seconds and adhere to cardbase. Lightly ink with Confetti Cake ink using a Blender Brush. Remove stencil.
- Adhere Fancy Florets stamps to cardbase with foam tape as shown, attaching the free floating flower in the upper center-right with foam tape folded in half for extra height.
- Stamp thinking of you from the On Occassion stamp set on Sugar Cube with Oreo ink. Die cut with coordinating die. Attach to center of card with foam tape.
- Add Clear Drip Drops with liquid adhesive as shown.

|


Thanks for stopping by today! I hope you got a lot of inspiration and go check out the rest of the design teams’ AMAZING work!
|


One response to “Floral Explosion”
This is the first set from the new release that caught my eye and your card is SO INSPIRATIONAL! Can’t wait to get my set!